Borders & padding
More complex designs can be achieved in the Email Builder by careful and clever use of both borders and padding.
Borders – Are most commonly used in order to surround a section of your email with a different colour in order to section it off from other content.
Padding – Should be used to create space between the border and the content itself.

Example of border and padding and where they are used
Both can be adjusted from the styles panel (paint palette icon) by setting the desired width.
For the borders you can select the colour and style whereas padding doesn't require these as it simply creates a gap where the background colour of the component will show through.
Remove
In order to keep the email looking as close to the final version as possible during the build process, Maxemail does not add any unnecessary extra toolbars or grab handles. This means you can see your content exactly as it will appear to your recipients but also means that there are a couple of places where it is useful to know how to use the Email Builder's features to keep a streamlined workflow.
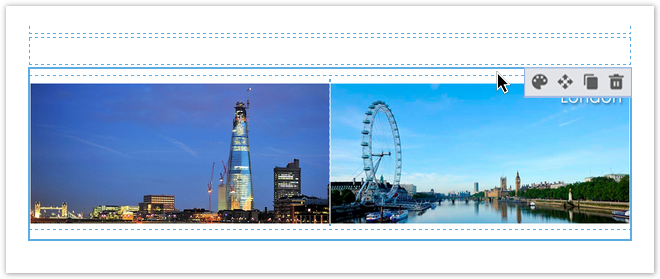
The most common scenario you may come across is if you choose to remove padding completely from a structural component which you then fill with content (e.g. a two-column component with an image in both the left and right columns). With the default 5 pixels of padding on the 2-column component, you can see a thin (5 pixel) gap around the edge of the images which you can hover your mouse on to bring up the style, move, copy and delete options.

Removing the padding however (in order to get the images to sit flush next to each other) means you are no longer able to get your pointer into that gap as it doesn't exist.

Using the Show Outlines option you are able to add 5 pixels of false padding to the top and bottom of all components in your design meaning that you can once again have a little room to hover your pointer and get to the toolbar options.

Once you have made any required changes you can hide the outlines to once again see the true email design
Updated 5 months ago
