Controlled Email Builder templates
It is possible for a template creator to build controlled templates using the Email Builder. Controlled Templates are used when it is important that the person creating and adding the content should only have access to specific areas of the email, so preserving the overall design and company branding. Areas which are not made editable by the template creator are essentially locked from the user building the email when they are using that template in their email campaign.
Setting Editable and Non-Editable Regions
Use the usual Email Builder tools to build your layout until you are happy with the overall template.
The next stage is to set which areas are editable by users who select your template as the base for their email.
Start by clicking the Controlled Template button. This will do two things:
- Make all components non-editable
- Switch on Show Outlines
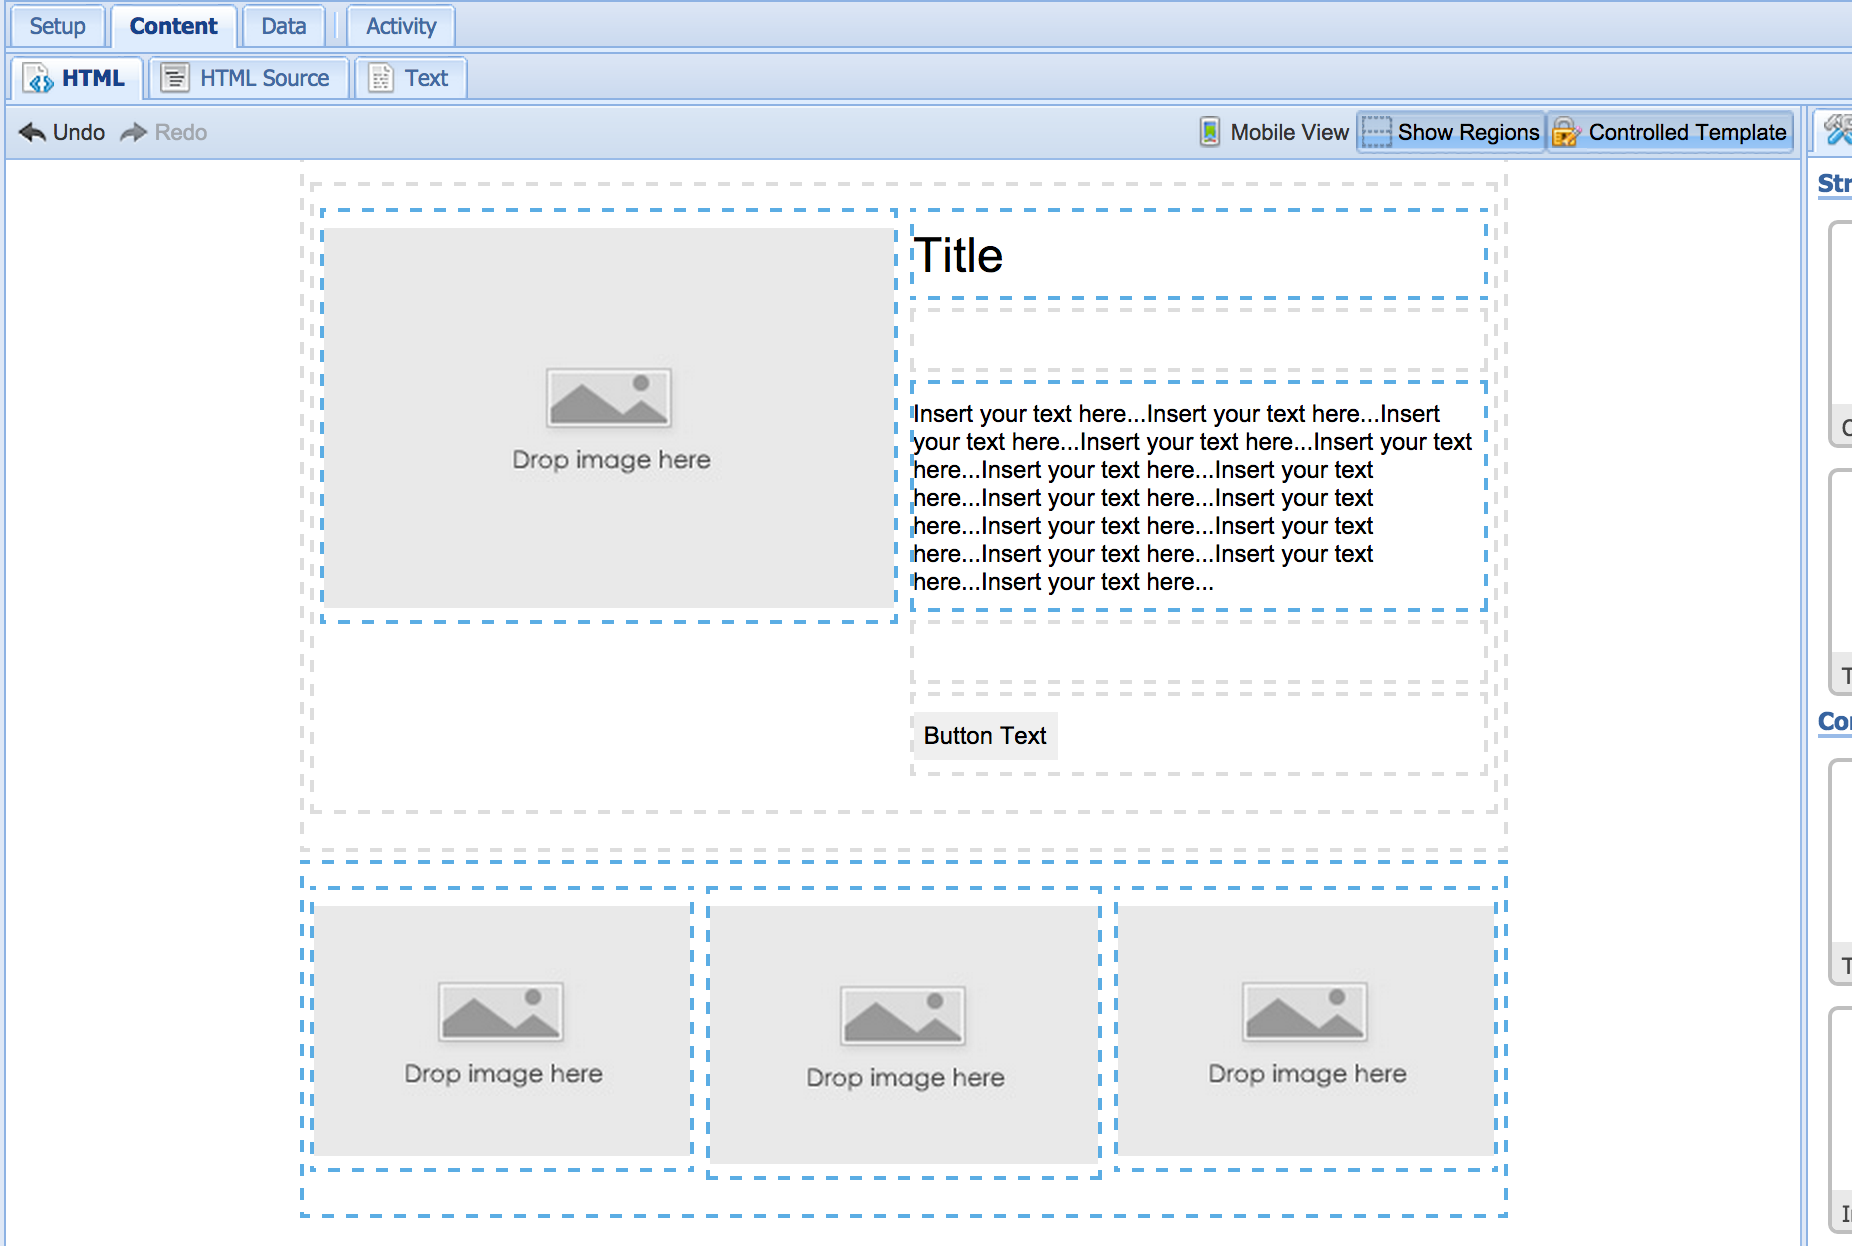
This gives you an exploded view of your template, making it clear which areas are set to be editable and which are not. To start with, all areas will be non-editable, meaning that any user selecting this template would not be able to make any changes to its content at all. Non-editable regions are indicated by a light grey dotted outline.
Non-editable regionsThe dotted outlines are only for your reference as the template editor. Non-editable regions are still accessible and editable while building the template. It is only when using the template to create an email that the regions will become non-editable.
To make any component editable you can hover over it to display the hover menu and click the pencil icon.
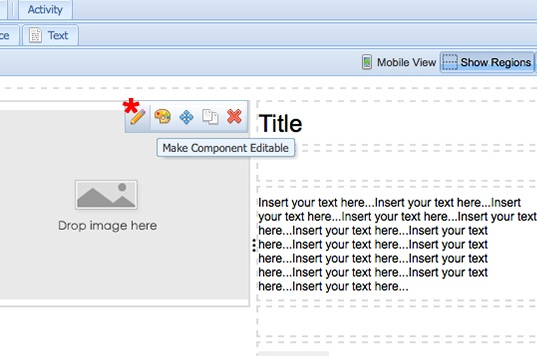
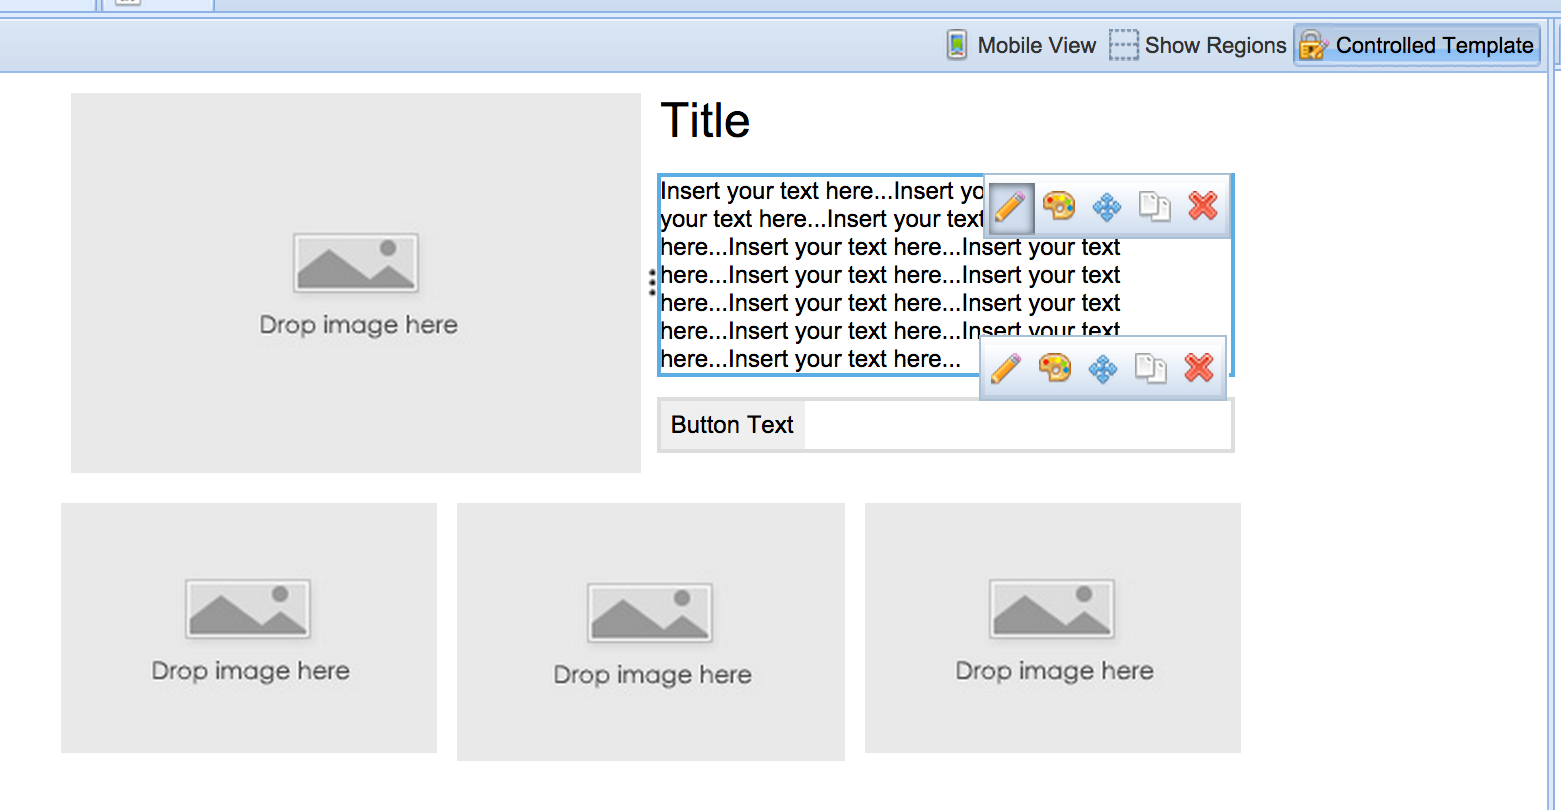
Components which have been made editable are indicated by a light blue dotted outline.
It is worth noting that any components within the editable one are also set to be editable. This allows you to be very specific about which regions you allow your users to control.
In the screenshot below, the two-column layout on top is not editable, but the image, title and text components have been made editable. This allows the user building their email to switch and edit the image as well as edit the title and text sections but they will not be able to edit the button or spacers. They will also not be able to drag any further components into that region of the template as the two-column structure itself is effectively locked to them.
The three-column component below it has been made editable from the structure itself. This means that not only are all the images editable but the user will also be able to drop in new components to any of the three columns.
TipTo give your users an empty area within the template to create any layout and add content as they wish, simply add a one column layout component and make that editable. This will then allow the user to drop in their own structural and content components in order to create their own layout.
Lastly, if you would like to see your template without the region outlines, you can turn them off again by clicking the Show Regions button next to the Controlled Template button. You can still see the editable and non-editable components by hovering over each one.
Using The Template To Create An Email
When the Controlled Email Builder Template is used to create an email, the blue outline is only shown on the editable areas. Non-editable areas of the template will simply not show any outline or toolbar options.
Editable regions can be used in the same way as a regular Email Builder email with features such as text formatting and image editing all available. Full access is still available to the Mobile View in order to allow checking of content there too.