Convert social followers to email
Show a Subscriber Bar to readers of the shared online version, to encourage new subscriptions
Why use a Subscriber Bar?
It is highly likely that you will have a lot of customers (as well as potential customers) following your business on social media. There is also a high probability that many of these will not yet have signed up to your email marketing list. With email marketing still far out-stripping social when it comes to ROI per campaign, doesn't it make sense to do what we can to get your lovingly created email content in front of as many of those social followers as possible? That way we can speak to them directly using all the benefits of dynamic content and segmentation that email can offer.
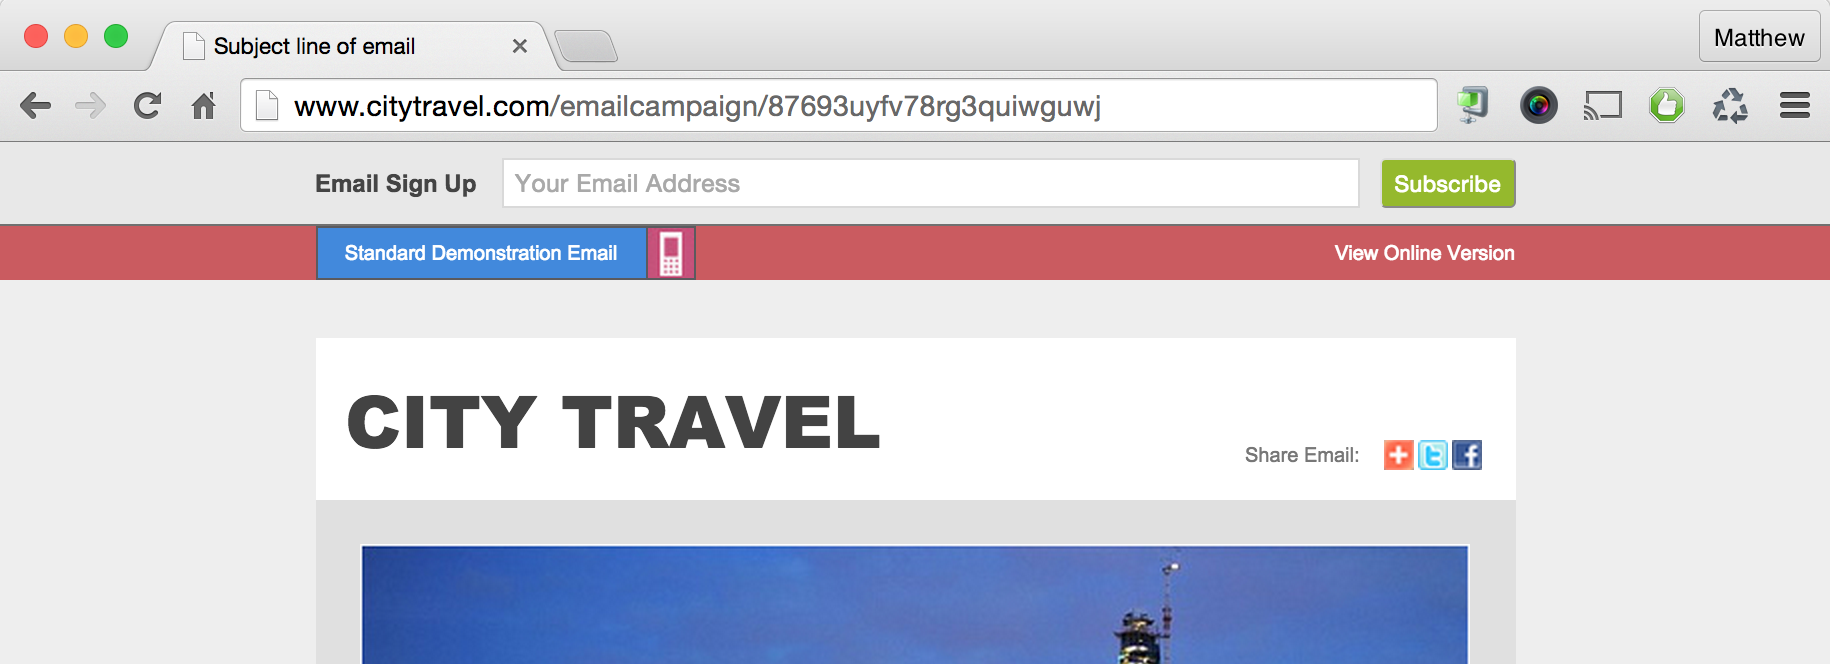
Maxemail's Subscriber Bar can be added to the shared version of any email and can be as simple to use as checking a box in the setup tab of your campaign. The basic bar is added to the top of the page and looks like this:

Now when you share your email to your company's social newsfeeds, potential subscribers will be able to sign up to your email marketing list directly in the page (without ever needing to leave the email they're reading!).
Also works independentlyThe Subscriber Bar has been built to work for you even if you are not using Maxemail's built in social media features. Simply copy and paste the Shared version URL into your social newsfeeds for the same results.
End User Experience
Keeping the process of signing up as short and as simple as possible is key to allowing your social followers to add themselves to your email marketing list. For this reason we have made it as simple as typing out an email address and clicking one button (or even pressing enter so they don't even need to reach for the mouse!)
When arriving at the online version of your shared email from any social post they will be greeted by the email content and, at the top of the page, almost as an extension of the browser, the subscriber bar.
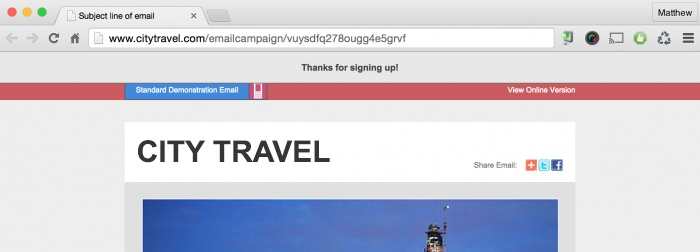
Typing out their email address and clicking / pressing enter will give them a confirmation message right there in the page, leaving them free to carry on reading the content of your email if they so wish.
Easy hey?!
So how is the Subscriber Bar set up? There are a couple of options you can set but lets start with the very basic, switching it on...!
Simple Use
The simplest way to add a subscriber bar to the shared version of your email is to navigate to:
Setup tab > Social Media section > Subscriber bar
Where you will find the following options:

From here all that is required is for the Enable checkbox to be ticked. You can then view how the subscriber bar will look in your shared email by clicking the preview link at the bottom of that section.
You can view how the bar will look on your email by clicking the Shared version link, or copy and pasting it into your browser. This is also the link you should paste into your social newsfeed if you are sharing it manually and not letting Maxemail do this automatically at email send time.
Advanced Use
Changing the List
By default, the Subscriber Bar uses a form called Subscriber Bar to add new recipients to a list called Subscriber Bar. This keeps things nice and simple and means you can use the Subscriber Bar with a minimum amount of setup.
If you would like to add new recipients to a different list, maybe one you keep as a primary list, or one you use for a particular site, then you can open the Subscriber Bar form (by clicking on the icon to the right of the drop-down) and change the list to the one you want.
Changing the Form
Choosing to use a different form for different emails allows you to:
- Add new recipient sign ups to different lists for different emails
- Send different triggered emails in response to a sign up depending on the shared email they are signing up from
To change the form used you can simply select it right on the email setup tab. In order to have different forms to select though you will first need to create them.
Creating Subscriber Bar Forms
The Subscriber Bar sign up uses a specific type of form called, you guessed it, a Subscriber Bar Form. These forms contain a cut down list of options from a regular form to let you set just what you need.
The only option you really need to worry about is which list the new recipients signing up using this form are added to.
Other (non-required) options are as follows:
-
Triggered Email:
- Allows setting of a particular triggered email to send when form is submitted (new recipient signs up).
-
Store submission date in:
- Allows the date/time of sign up to be stored in an existing profile field.
-
Email results to:
- Notifies email address(es) of your choice each time the form is submitted.
Once your Subscriber Bar form is how you would like it, remember to set it against the email campaign in the set up tab and you're good to go
Updated 7 months ago